
Choosing the right Iron Pendant Light in 2026 requires more than matching a finish to your dining table. The fixture must balance visual character, usable brightness, installation safety, and long-term durability. A matte black shade may look striking in a kitchen, while a brushed iron finish can soften a minimalist dining room. However, appearance alone can mislead.
Begin with the room’s dimensions and ceiling height. A pendant hanging above a table should provide focused light without blocking conversation or sightlines. Measure the table width, then compare it with the fixture’s diameter. For a low ceiling, choose a compact design with an adjustable rod or cord. Check the recommended bulb type, maximum wattage, color temperature, and dimmer compatibility. These details matter more than a product photograph.
Safety deserves equal attention. Confirm that the Iron Pendant Light meets recognized electrical standards in your region, such as UL, ETL, CE, or another approved certification. Product labels and installation instructions should be clear. Ask a qualified electrician to inspect the ceiling box, wiring, and grounding before installation. A beautiful fixture cannot compensate for weak support.
Think about daily use, not only the first impression. Will the metal collect grease near the stove? Can the shade be wiped easily? Does the open frame create harsh shadows on your work surface? These questions are easy to overlook. I would also reconsider buying the largest design available; dramatic scale can quickly become visual clutter. The best choice usually feels intentional, performs reliably, and still suits the room after the trend fades.
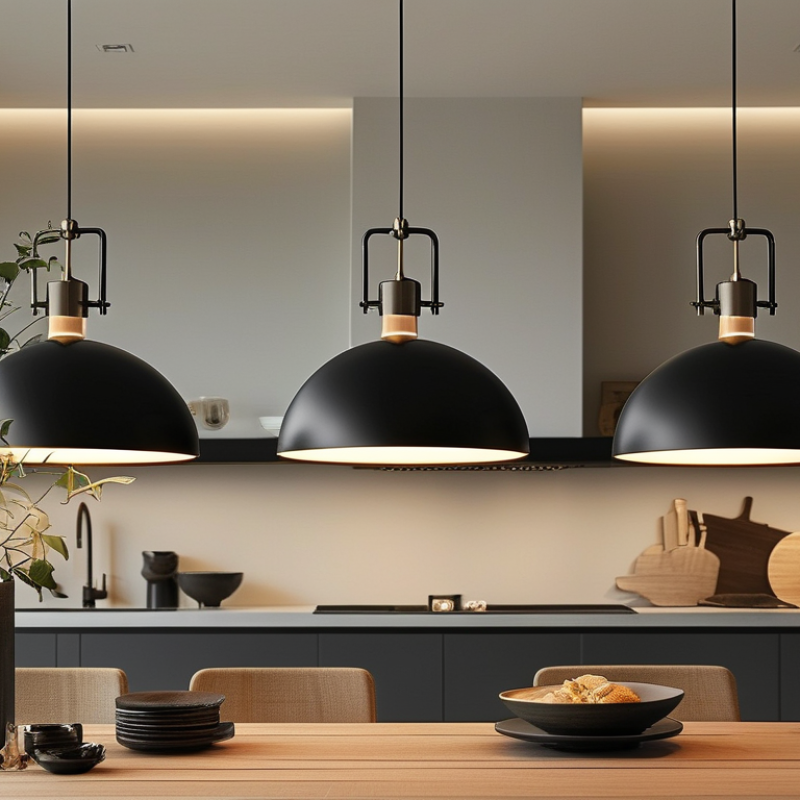
Start with the room, not the fixture. Measure its length, width, and ceiling height. A dining table usually needs focused light, while a living room needs softer, layered illumination. For comfortable dining, choose a pendant that hangs about 30 to 36 inches above the tabletop. Keep walkways clear. A low fixture can look dramatic, but it may become annoying quickly.
Check the bulb before judging the iron shade. The U.S. Department of Energy reports that LED bulbs use at least 75% less energy than incandescent bulbs and last up to 25 times longer. Choose warm white light, around 2700K to 3000K, for bedrooms and relaxed seating areas. Use higher brightness for kitchens or work surfaces. The International Energy Agency has reported that lighting represents roughly 15% of global electricity consumption, so efficient bulbs matter beyond appearance.
Match the iron finish to the room’s visual language. Matte black supports industrial, modern, and farmhouse interiors. A softer dark bronze can suit traditional wood and textured fabrics. Open cages spread light widely, while solid shades create stronger downward pools. I have seen many rooms use oversized pendants simply because they looked impressive online. The result felt heavy in person. Measure twice. Leave breathing space around the fixture. Also inspect glare from your normal seated position; a beautiful pendant can still be uncomfortable when its bare bulb enters your sightline.
Iron pendant lights work best when their proportions match the room, not merely the furniture. For a 36-inch-wide kitchen island, a 12- to 18-inch pendant usually feels balanced. Leave about 30 to 36 inches between the countertop and the fixture’s lowest point, following NKBA residential planning guidance. Two smaller pendants can distribute light evenly, while one larger dome creates a stronger focal point. Measure twice. My first choice is often too large.
Shape matters as much as diameter. A cone or dome directs light downward, making it practical for food preparation and reading. A cage-shaped pendant spreads light outward and reveals more of the iron structure. In a narrow hallway, choose a compact cylinder or oval form. Above a rectangular table, a linear arrangement usually follows the table’s visual direction better than a round fixture. Keep at least 6 inches between the pendant edge and the island edge to reduce accidental bumps.
Material and bulb performance also affect the decision. The U.S. Department of Energy reports that LED bulbs use at least 75% less energy and last up to 25 times longer than incandescent bulbs. Choose warm light around 2700–3000K for dining areas, but test the color against dark iron before installation. Black metal can absorb visual attention. Sometimes, the “perfect” oversized pendant feels impressive online but oppressive in person. A cardboard mock-up helps, although I still underestimate ceiling height occasionally.
How to Choose the Right Iron Pendant Light in 2026?
Finish changes the entire mood of an iron pendant. Matte black feels architectural, while aged bronze adds warmth and visual softness. Brushed iron suits industrial rooms, but its texture can appear cold beside pale stone. In my installations, the best finish usually repeats a nearby detail, such as cabinet hardware or a faucet. Do not match everything perfectly. That can make the room feel staged.
Color temperature matters as much as frame color. Warm white bulbs between 2700K and 3000K flatter wood, linen, and warm paint. Cooler light may sharpen a workspace, but it can make black iron look harsher. The U.S. Department of Energy reports that LEDs use at least 75% less energy and last up to 25 times longer than incandescent lamps. Its 2020 Lighting Market Characterization estimated LEDs represented about 48% of installed lamps in U.S. buildings. Choose a dimmable LED with a high color-rendering index for better material accuracy.
Details deserve close inspection. Look for clean welds, even coating, solid canopy hardware, and adjustable suspension. Ribbed shades create patterned shadows; perforated metal creates a livelier ceiling effect. Glass inserts soften heavy iron, although they add cleaning work. I still overvalue dramatic silhouettes sometimes. A beautiful pendant can feel wrong when its lower edge sits directly in your eyes. Test the hanging height with cardboard first. Small mistakes become obvious at night.
Choosing the right iron pendant light begins with the bulb, not the frame. Match the bulb’s shape to the shade opening. A narrow opening needs a compact bulb. A wide cage can support a larger decorative globe. For dining areas, 800 to 1,100 lumens usually provides useful brightness. A softer bedroom may need only 400 to 800 lumens. Check the socket rating before buying.
Colour temperature changes the room’s mood. Choose 2,700K to 3,000K for warm dining or living spaces. Select around 3,500K for a cleaner kitchen workspace. Bulbs with a high colour rendering index show food and wood tones more naturally. Dimming is helpful, but the bulb and dimmer must be compatible. Flickering is not a design feature. It is often a warning sign.
Light direction deserves equal attention. An open iron shade sends light broadly across walls and furniture. A downward-facing shade creates a focused pool over a table. This works well when the pendant hangs 70 to 90 centimetres above the tabletop. However, a low fixture can block sightlines. I sometimes choose a brighter bulb to compensate, then regret the glare. Testing the pendant at night is wiser than judging it in a bright showroom. Use a spare bulb temporarily, and observe shadows on faces, worktops, and nearby walls. A qualified electrician should verify the mounting and wiring.
How to Choose the Right Iron Pendant Light in 2026?
An iron pendant light should suit your room and your ceiling structure. Before buying, check its total weight, dimensions, cord length, and mounting hardware. A heavy fixture may require a reinforced junction box, not a standard ceiling outlet. Measure the ceiling height carefully. Leave enough clearance above dining tables and walking areas. Low ceilings need compact designs. Sloped ceilings may need an adjustable canopy or angled adapter.
Installation safety deserves more attention than appearance. Turn off power at the breaker, then confirm the wires are dead with a voltage tester. Follow the fixture instructions and local electrical requirements. If the wiring looks old, brittle, or confusing, use a qualified electrician. Do not rely on a wall switch alone. I once underestimated a pendant’s weight, and the mounting plate sat unevenly. That small mistake could have become serious.
Tips: Choose a dry-location rating for bedrooms and living rooms. Use a damp-location rating near bathroom humidity, when permitted. Keep iron surfaces dry, and wipe dust with a soft cloth. Avoid abrasive cleaners, which can damage protective coatings. Inspect screws, joints, and cable covers twice yearly. Tighten loose hardware gently. Check for rust near kitchens or coastal windows. A small touch-up may help, but matching the original finish is not always easy. Be patient. Safety comes before style.
| Selection Dimension | Recommended Data or Requirement | Why It Matters | What to Check Before Purchase or Installation |
|---|---|---|---|
| Room and Mounting Location | Dry Indoor Use an indoor-rated fixture in bedrooms, living rooms, hallways, and dry dining areas. Damp Area Use a suitable damp-location rating for covered bathrooms, laundry areas, or sheltered outdoor spaces. | Iron and electrical components can deteriorate faster when exposed to moisture, condensation, or direct water. | Confirm the fixture’s location rating in the installation instructions. Do not install an indoor-only pendant where it may receive splashing or rain. |
| Ingress Protection | IP20 Generally suitable for dry indoor locations. IP44 or Higher Commonly selected for areas with moisture or occasional splashes, subject to local electrical rules. | The first IP digit relates to solid-particle protection, while the second relates to water protection. | Match the IP rating to the actual environment. An IP rating does not replace required clearance from showers, sinks, or outdoor weather exposure. |
| Ceiling Support and Load | The ceiling outlet box and mounting hardware must be rated for the complete fixture weight, including shades, bulbs, and accessories. | A pendant should be mechanically supported by a suitable outlet box or structural support, not by loose ceiling material alone. | Record the assembled fixture weight and compare it with the support rating. For heavy iron fixtures, use a properly secured brace or structural fixing installed by a qualified professional. |
| Electrical Compatibility | Match the fixture voltage, frequency, lamp base, maximum wattage, and dimming requirements with the building’s electrical supply. | Incorrect voltage, excessive wattage, or incompatible dimming can cause overheating, flicker, lamp failure, or damage to the control system. | Check the rating label and instructions before wiring. Confirm that the chosen LED lamp and dimmer are explicitly compatible when dimming is required. |
| Grounding and Wiring Safety | A metal-bodied pendant normally requires protective grounding where the electrical system and fixture design provide a grounding connection. | Grounding helps provide a low-resistance path for fault current and can reduce electric-shock risk. | Turn off the circuit at the breaker and verify that power is absent. Connect line, neutral, and protective earth according to local code; use a licensed electrician where required. |
| Hanging Height and Clearance | For a dining table or kitchen island, a common starting point is approximately 75–90 cm between the tabletop and the lowest part of the pendant. Keep the bottom of the fixture at least about 210 cm above a walking surface where practical, while following local requirements. | Correct clearance reduces head-impact risk, glare, and visual obstruction while preserving useful task lighting. | Measure from the finished floor and tabletop. Adjust for household height, sightlines, door swings, and the pendant’s actual dimensions before final tightening. |
| Light Output and Color | Choose lumens based on room size and task needs rather than wattage alone. Warm residential lighting is commonly around 2700–3000 K. For color quality, look for CRI 80 or higher; CRI 90 or higher is preferable where accurate colors matter. | Lumens describe visible light output, color temperature affects ambiance, and CRI indicates how naturally colors appear. | Check the lamp or integrated LED specification for lumens, Kelvin rating, CRI, beam spread, and whether the light source is replaceable. |
| Shade, Glare, and Heat Management | Select a shade that directs light toward the intended surface without exposing occupants to uncomfortable brightness. Keep all lamps within the stated wattage limit. | Opaque iron shades can create strong downward shadows, while enclosed or poorly ventilated shades may retain heat. | Check ventilation openings, lamp clearance, shade direction, and the manufacturer’s maximum lamp wattage. Avoid covering vents or using lamps that exceed the rating. |
| Finish and Corrosion Resistance | For normal indoor use, choose a sealed, powder-coated, painted, or otherwise protected iron finish. Use a finish specifically approved for damp or exterior conditions when applicable. | Unprotected iron can develop surface rust when exposed to humidity, condensation, salt air, or cleaning chemicals. | Inspect seams, welds, screw heads, and chipped areas. Keep the fixture dry and repair damaged coating with a compatible touch-up product. |
| Cleaning and Routine Maintenance | Dust the fixture approximately every 1–3 months, depending on the environment. Clean promptly after visible residue or insect buildup appears. | Dust reduces light output, while moisture and residue can accelerate corrosion and stain the finish. | Switch off and allow the fixture to cool. Use a soft, dry microfiber cloth; if needed, use a slightly damp cloth and dry immediately. Do not spray liquid into sockets or electrical parts. |
| Inspection and Replacement Planning | Inspect the canopy, screws, chain or rod, cable strain relief, finish, and electrical connections at least annually, or more often in high-use or humid locations. | Loose hardware, damaged insulation, discoloration, buzzing, flickering, or heat marks can indicate a safety problem. | Stop using the fixture if wiring is damaged, the canopy is loose, or there is burning odor or visible overheating. Arrange professional inspection before reuse. |
| Documentation and Future Service | Keep the installation instructions, rating label details, lamp specifications, and replacement-part information accessible. | Accurate records make future bulb replacement, cleaning, troubleshooting, and safe relocation easier. | Photograph the rating label after installation and record the lamp type, maximum wattage, mounting hardware, and installation date. |
Safety note: Electrical installation must follow the applicable local code. When the ceiling support, wiring, grounding, or circuit condition is uncertain, use a qualified electrician.
© 2025 Grandmark International. All rights reserved.
© 2020 Grandmark. Grandmark International. All rights reserved. Proud shareholder of Temot International.