grandmark logoGrandmark International
@alexaseleno
Skip to main content

10 Tips for Buying Quality Automotive Glass?

Buying quality automotive glass is not merely a matter of choosing clear glass at the lowest price. The windshield supports visibility, passenger protection, and increasingly, electronic driving systems. The World Health Organization’s Global Status Report on Road Safety 2023 estimates about 1.19 million annual road deaths worldwide. That figure gives ordinary glass a serious context. Small defects can matter.

Bob Beranek, a respected automotive glass safety expert and former Auto Glass Safety Council president, stated, “The windshield is the third most important safety restraint in a vehicle, behind seat belts and airbags.” His warning remains practical. A suitable replacement should match the vehicle’s specifications, not just its shape. NHTSA standards, including FMVSS 205 and FMVSS 212, address glazing materials and windshield retention. These requirements are a useful starting point, but compliance alone does not guarantee a perfect installation. It is easy to overlook optical distortion, acoustic layers, heating elements, or camera brackets.

This guide presents 10 tips for buying quality automotive glass, from checking DOT markings to confirming adhesive curing times. It also considers Advanced Driver Assistance Systems, because a windshield replacement may require camera recalibration. Research from Fortune Business Insights identifies ADAS adoption as a major influence on the automotive glass market. Still, market growth does not equal better service everywhere. A polished showroom can hide weak installation habits. A low quote may look attractive. It may also exclude calibration, molding, or warranty coverage. No checklist is perfect, but asking precise questions can prevent expensive surprises and protect the view directly in front of you.
10 Tips for Buying Quality Automotive Glass?

Understanding Automotive Glass Quality Standards

10 Tips for Buying Quality Automotive Glass: Understanding Automotive Glass Quality Standards

Quality automotive glass is not simply clear glass cut to fit. It is a safety component that supports visibility, occupant retention, and airbag performance. In the United States, Federal Motor Vehicle Safety Standard 205 requires glazing to meet light-transmission, impact, and marking requirements. Buyers should check for the correct certification mark, not just a perfect-looking surface.

Regulation matters. UNECE Regulation No. 43 covers optical quality, fragmentation, and resistance to impact in many international markets. The Insurance Institute for Highway Safety reports that rollover crashes account for roughly one-third of passenger-vehicle occupant deaths in the United States. A properly bonded windshield can help maintain cabin integrity during severe impacts. The glass alone cannot prevent every injury, though. Installation quality is equally important.

Professional technicians should verify the vehicle identification number, glass position, adhesive specifications, and safe-drive-away time. Advanced driver-assistance cameras may also require calibration after replacement. Industry repair guidance commonly recommends following the adhesive maker’s tested curing conditions, rather than guessing from room temperature. That small detail is often overlooked.

Look closely at the edges. Chips, distortion, uneven black ceramic borders, or excessive wind noise suggest poor quality or fitting. A cautious buyer may request documentation showing compliance with FMVSS 205 or UNECE R43. Some aftermarket glass performs well, while some does not. The label is not the whole story. Performance can vary between suppliers, and that deserves honest checking.

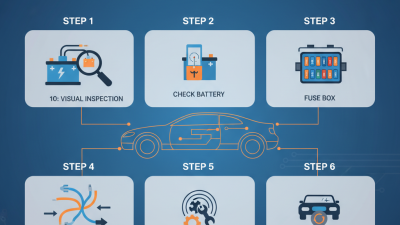
Identifying the Correct Glass for Your Vehicle

Identifying the correct glass starts with the vehicle identification number, not appearance. Confirm the VIN, model year, body style, and production date. Small differences can change the glass shape. Check the original glass marking, thickness, tint band, acoustic layer, and embedded antenna. The label alone is not enough. Measure carefully.

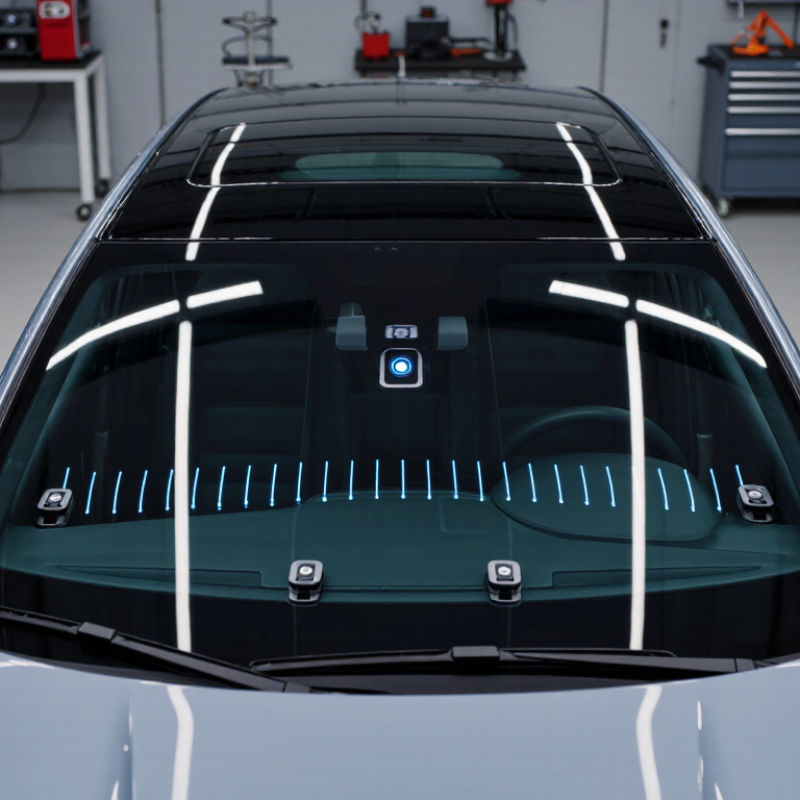
Inspect the interior side. Does the windshield have a camera bracket, rain sensor, heating element, or head-up display area? A replacement must match these features exactly. The Insurance Institute for Highway Safety reports that front crash prevention reduces rear-end crashes by about 50% in real-world claims analysis. That makes camera placement important. Even a slight bracket shift can affect the viewing angle. Ask whether recalibration is required after installation. Request the calibration result in writing.

Choose glass meeting applicable safety glazing standards, and verify the installer’s training and warranty terms. Check for distortion by viewing a straight door frame through the glass. Look for waves, bubbles, uneven edges, or a loose seal. I would not judge quality by price alone. A cheaper panel may omit an acoustic layer or sensor mount. Yet vehicle databases can be incomplete, especially after mid-year design changes. Recheck the part against the VIN before ordering. Leave the vehicle stationary until the adhesive manufacturer’s safe-drive time has passed. It is an easy detail to overlook.

Checking Materials, Fit, and Safety Features

Buying quality automotive glass starts with materials, not appearance. Tip 1: Look for certified laminated glass. It should resist shattering into dangerous pieces. Tip 2: Check the safety marking and confirm compliance with FMVSS 205. Tip 3: Avoid glass with bubbles, waves, scratches, or uneven tint. These flaws can distort headlights at night.

Fit matters just as much. Tip 4: Match the glass to the vehicle’s exact year, model, and sensor package. Tip 5: Compare the edge shape with the original piece. Tip 6: Inspect the seal for even contact around the frame. Tip 7: Ask whether camera or rain-sensor calibration is included. A small alignment error can affect driver-assistance warnings. NHTSA recorded 40,901 traffic deaths in 2023, so clear visibility and reliable safety systems deserve careful attention. The number does not prove glass caused those crashes, but it shows why minor installation shortcuts deserve scrutiny.

Safety features need practical checking. Tip 8: Confirm the glass supports the vehicle’s airbags and roof structure. IIHS research identifies the windshield as part of the passenger compartment’s structural support. Tip 9: Request the glass manufacturer’s traceability details and installation instructions. Tip 10: After installation, inspect for wind noise, water leaks, and loose trim. FMVSS 212 addresses windshield retention during crashes. I once trusted a perfect-looking replacement, then noticed slight optical distortion in rain. That mistake changed my inspection routine. Appearance alone is not enough.

10 Tips for Buying Quality Automotive Glass? - Checking Materials, Fit, and Safety Features
Tip Inspection Area What to Check Reliable Quality Indicator Warning Sign
1 Confirm the glass type Verify whether the replacement is intended for the windshield, side window, or rear window. Windshields are normally made from laminated safety glass, while most side and rear windows use tempered safety glass. A seller cannot clearly identify the glass construction or intended vehicle position.
2 Match the vehicle application Compare the vehicle year, make, model, body style, trim, and window position with the part information. The application details match the vehicle identification information and the exact glass location. The part is described only as “universal” without specific vehicle compatibility details.
3 Inspect the fit and shape Check the outline, curvature, mounting edges, cutouts, and locating features before installation. The glass sits evenly in the opening, with consistent gaps and no forced bending or excessive adjustment. Visible distortion, uneven edges, misaligned holes, or a shape that requires pressure to fit.
4 Look for safety markings Examine the permanent marking for the applicable safety certification, glass type, and manufacturer or production information. The marking is clear, durable, and consistent with the safety requirements for automotive glazing in the intended market. Missing, removable, blurred, or suspiciously inconsistent markings.
5 Check optical clarity View straight lines and distant objects through the glass from several angles and distances. The image remains clear, with minimal waviness, double images, haze, or visual distortion in the driver’s viewing area. Noticeable ripples or distortion that could interfere with visibility, especially near the windshield’s primary viewing zone.
6 Evaluate the laminate and edges For laminated glass, inspect the interlayer and perimeter for bubbles, cloudiness, separation, chips, or exposed layers. The laminate is uniform, transparent, and fully sealed around the edges without delamination. Air bubbles, milky areas, peeling layers, edge cracks, or moisture trapped between layers.
7 Verify functional features Identify features such as a shade band, antenna, heating grid, rain sensor area, camera bracket, or head-up display compatibility. Every required feature is present, correctly positioned, and compatible with the vehicle’s systems. A missing sensor mount, incorrect antenna layout, blocked camera area, or unverified display compatibility.
8 Inspect the surface and edges Check both faces and the perimeter under bright, even lighting before fitting. The surface is free from scratches, pits, cracks, chips, sharp edges, and manufacturing residue. Damage that is hidden by packaging, rough edges, or cracks extending from the perimeter.
9 Review installation requirements Confirm the correct molding, clips, adhesive system, primer requirements, and safe drive-away time. The installer follows the adhesive manufacturer’s curing instructions and uses compatible replacement components. Immediate driving is recommended without observing the required adhesive curing period.
10 Ask about inspection and warranty coverage Obtain written details covering defects, leaks, wind noise, optical problems, and installation-related issues. The seller or installer provides traceable product information and clear procedures for reporting defects or fit problems. No return policy, no defect procedure, or refusal to inspect the glass before installation.

Evaluating Installation Services and Technician Credentials

When evaluating automotive glass installation, inspect the service process, not only the quoted price. Ask whether the technician follows the Auto Glass Safety Council’s AGRSS installation standard. This standard emphasizes qualified personnel, documented procedures, and traceable records. Request proof of current training, practical experience, and insurance coverage. Confirm the glass matches the vehicle’s exact year, model, sensors, tint, and acoustic requirements. A vague answer is a warning.

The windshield is structural equipment. Insurance Institute for Highway Safety research indicates it can provide about 45% of cabin strength in a frontal crash and nearly 60% during a rollover. Ask how the technician prepares the bonding surface, controls contamination, and measures adhesive curing time. Check whether camera-based safety systems require recalibration after replacement. The installer should provide a written calibration result, not verbal reassurance. Also verify technician identification, workspace cleanliness, weather controls, warranty terms, and post-installation inspection. A qualified technician should explain each step in plain language. I still question rushed “same-day” promises. Speed is useful, but adhesive chemistry does not negotiate. Ask for the adhesive’s safe-drive-away time, based on temperature and humidity. Keep the paperwork.

Comparing Warranties, Costs, and Long-Term Value

10 Tips for Buying Quality Automotive Glass

A low quote can hide important differences. Ask whether the glass is original-equipment equivalent, properly shaped, and free from visible distortion. Check the warranty in writing. It should explain coverage for leaks, stress cracks, installation faults, and premature defects. Confirm the warranty period and whether labor is included. Some offers sound generous but exclude the most likely problems.

Compare the complete cost, not only the glass price. Request separate figures for removal, adhesive, molding, disposal, and calibration. A vehicle with cameras or sensors may require electronic calibration after replacement. Ask who performs that work and whether a written calibration report is provided. Inspect the installer’s training, insurance, and safety procedures. Confirm that the adhesive has enough curing time before driving. It matters.

Long-term value often appears in small details. Quality glass should provide clear visibility, consistent tint, and a precise fit around the seal. Check for wind noise during a short road test. Look for water leaks after washing the vehicle. Keep the invoice, glass specifications, and warranty documents together. I once focused too heavily on the lowest quote and overlooked calibration costs. That decision was cheaper for one day, not for ownership. Ask about recycled or reused parts carefully, since condition and compatibility can vary. A fair provider should answer directly, admit limits, and explain what happens if the first installation is imperfect.

10 Tips for Buying Quality Automotive Glass: Warranty, Cost, and Long-Term Value

Typical U.S. replacement-market midpoint benchmarks for comparing automotive glass options. Actual prices and warranty terms vary by vehicle, glass specification, and installation conditions.

How to read the chart: Higher-quality glass generally has a higher upfront replacement cost but may provide longer warranty coverage and a longer expected service life. When comparing quotes, verify optical clarity, safety certification, installation quality, calibration requirements, and the written warranty rather than choosing only by price.